Saturday, August 23, 2008
Friday Frenzy
29th August 2008
Our regular crop night is on again this friday. Spots are filling up fast, so get in early to reserve your scrap space.
Please bring nibbles to share and money to chip in for a pizza if you are interrested (yum yum!)
A small prize will be on offer on the night for the person to complete the most layouts based on the challenges.
Challenge One:
Complete a double page layout or two single page layouts using the sketch below. Sketch by Becky Higgins.
Challenge Two:
Complete a single page layout using the sketch below. Sketch by Stickers N Fun.
Challenge Three:
Complete a card using one of the sketches above.
Challenge Four:
Use the colours brown and blue or brown and pink to complete a single page layout.
Challenge Five:
Use the technique of ripping paper to complete a single page layout or a card.
See you there for a scrap happy time!
Lovely Lace
2nd and 4th September 2008
In this class we will make a layout and then a card to use up some scraps! They feature the gorgeous lace cardstock that is available from a range of companies.
Card Sneak Peek:
Layout Sneak Peek:
Supplies needed:
Layout:
Two photos 4" square.
One piece of coloured cardstock for the background (I used pale blue).
One piece of cardstock for a background mat (I used black coredinations and distressed the edge).
One piece of cardstock for an oversized photo mat (I used pearl Bazzill bling).
One piece of lace cardstock.
One piece of coordinating patterned paper to make a circle (good use of a scrap).
Alphabet for a title.
Mat pack if you have one.
Hole piercer.
12" x 12" Mijemoo push pad if you have one.
Gel pen for fake stitching (I used white).
Gel pen for journaling (I used red).
Sandpaper.
Edge distresser.
Fiskars circle template if you have one.
Card:
One piece of cardstock 12" x 6".
One piece of patterned paper 6" x 6".
Scrap of lace cardstock (left over from layout).
Jumbo eyelets OR large brads OR buttons.
Swirly rubon, if desired.
Craft knife.
Ruler.
Techniques used:
Edge distressing, paper tearing, sanding, stamped lines for journaling, fake stitching, hand cutting, photo cropping.
Surprise! It's your birthstone...
27th August 2008
Bazzill Basics paper company have a new range of "bling" on the market! We will use this cardstock range as the basis of a page all about you. We will use a "She" quote by Kobi Yamada as the journaling and fun embelishments to make the page extra special for you. The page can also be adapted to suit a male or a child if you wish!
Supplies needed:
Bazzill Bling birthstone cardstock (available on the night).
One piece of cardstock or patterned paper with a shaped edge (to be cut down to size).
One piece of patterned paper for a background.
One piece of patterned paper to make bracketts.
Ink to define the edges of your bracketts.
The letters "SHE" for your title (or "HE" if you are doing a masculine page).
Two photos EXACTLY THE SAME in 4" x 3" (portrait orientation).
A range of embelishments to complement your page (I used paper and felt flowers, clear acetate butterflies and flowers with kindy glitz on them, buttons and large glitter brads). For a masculine page you could use stars and circles with buttons, brads and eyelets.
Gel pen in a colour to complement your page, for journaling.
Embroidery thread and a needle.
Mat pack if you have one.
Hole piercer.
Foam tape to raise your photo.
Sandpaper.
12" x 12" Mijemoo push pad if you have one.
I will bring journaling stamps and a couple of neutral inks to stamp the pages ready to journal on.
Techniques used:
Sanding, hand cutting, inking, hand stitching, stamping, hand written journaling, double mounting of photos.
Class three: 6 X 12 Success
This was a great class. It was challenging for me to teach because I had 2 pages going in the class, but this was fun and made class interresting! Also, great job M who completed 3 pages on the night! Or was it 4? Most people mounted their 6 x 12 layout on 12 x 12 cardstock for ease of storage in their album, but every single one looked fantastic.
Thanks once again for two great nights.
"Concentration": a feminine take on the theme
"Mine Art": a masculine take on the theme
Thanks once again for two great nights.
"Concentration": a feminine take on the theme
"Mine Art": a masculine take on the theme
Technique Class: covering chipboard
25th August 2008
In this technique focused class, you will learn how to cover chipboard and wood shapes with paper. This technique can be used to cover any firm, shaped , flat product. One of the most popular applications is to cover chipboard alphabets. This means you can buy one alpha and convert it to any colour or pattern you want!
You will work with one of the wood mini albums by Kaiser, covering it with patterned paper and adding photos and embelishments for a fantastic keepsake.
Supplies Needed:
Kaiser mini album in the shape of your choice (can be purchased on the night - between $5 and $10).
Three to four sheets of patterned paper to cover album pages.
One sheet of cardstock to mat photos.
Three to six photos that can be trimmed down to fit varying sized pages (preferably smaller than 6 X 4).
Ribbon.
Brads or buttons.
Flowers, stars, etc to embelish pages.
Gel pens for journaling.
Alphabet for a title.
Paint brush.
Wet glue (preferably Tombow mono multi in the white squeeze bottle with green lids).
Tuesday, August 12, 2008
Funking it up with Basic Grey
This fortnight we will mix up the size of our layouts and complete a 6" x 12" page. We will focus on using the divine Basic Grey paper ranges. Students will be offered huge discounts on individual sheets of BG paper, paper packs and on BG embelishments, but only on the night of class!
Feminine Sneak Peek
Supplies needed:
One photo 4" x 3" (landscape) and two 2" x 3" (portrait) or photos that can be cropped to these sizes.
Neutral cardstock to mat photos.
One piece of patterned paper 6" x 12".
Two strips of coordinating patterned paper 12" long.
One scrap of paper to make a tab.
12" piece of ribbon / ric rac.
Needle and embroidery thread.
Two brads (or eyelets, buttons, flowers etc).
Corner rounder.
Fiskars circle template.
Mat pack if you have one.
Hole piercer (pig stabber).
Computer journaling strips of gel pen to write journaling.
Alphabet for a title.
12" x 12" neutral cardstock to mount your 6" x 12" layout if you desire.
Basic tool kit.
Masculine Sneak Peek
Supplies needed:
Two photos 4" x 3" (portrait).
One piece of 6" x 12" patterned paper.
One piece of neutral cardstock to mat photos and for a journaling strip.
Strips of patterned paper and ribbon 12" long.
Alphabet for a title (I used two different alphas - one felt, one acetate)
Brads etc to attach your alphas if required.
Mat pack if you have one.
Hole piercer (pig stabber).
Edge distresser.
Needle and embroidery thread if hand stitching.
Gel pen for hand journaling.
12" x 12" cardstock to mount your 6" x 12" layout if desired.
Basic tool kit.
If you need any assistance, please feel free to contact me.
Looking forward to seeing you in class.
Class Two: creating movement
Class One: cuttlebugging it!
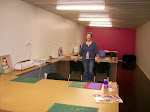
This was a great class and heaps of fun. The new scrap room was such a hit and is fantastic to teach in. I can't wait to teach more at the shop!
Well done to all the students - you all did a great job texturising your paper and also masking the background of your pages. Thanks for making it a great class!
Subscribe to:
Posts (Atom)